JandersUF is back with another model masterpiece.

The JagdPanzer IV / L48 was an early variant of a casemate-type tank-destroyer [turretless tank] produced on a Panzer IV chassis by the Germans in mid-WW2. These offered a more economical production with similar anti-tank performance to the Panzer IV, with excellent frontal armor protection and a low silhouette excellent for ambush and defensive tactics. In exchange they lost the flexibility of a turret, and some degree of offensive and anti-infantry performance due to slow gun handling and lesser tactical mobility and engagement parameters. It was later upgraded to the Lang L/70 version with a longer gun with improved anti-tank performance, along with sundry other minor changes. For example, the return rollers were reduced in number from four to three to simplify production. This particular vehicle is an example of 1943-44 production. Some of these were recovered after the war, and restored for use by a number of countries. Eventually six were sold by Czechoslovakia to Syria in the 1950s in an arms package along with Hummel self-propelled artillery pieces and multiple Panzer IVs. In 1967 these six vehicles, along with multiple other >20year old German WW2 relics, were used to attack Israel in the Six Day War. One was known to be knocked out, the other 5 likely were pulled back prior to significant action, but the full story is not known.
warning – picture heavy post!
A brief visual of how we got the chipped/worn paint effect on the final tank, using the “hairspray technique”.

For this finish, we wanted a beat up green paint which had chipped and worn away to reveal some steel/rust underneath. For this we start with Black Primer (Mr Surfacer 1500 Black)

Then we add a rust/steel color over the top, with some inherent variations. I used Tamiya Paints for this– Hull red, dark grey, some clear orange.

Once you have a good “base” color, in this case rusty steel, you spray hairspray over it. If you are good, you get hairspray on your phone camera lens for this awesome effect.

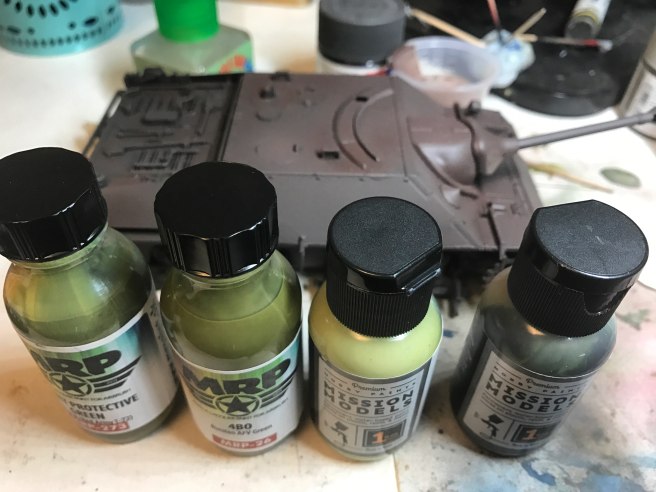
Then you pick the best green for the job… I chose Mission models for this job!

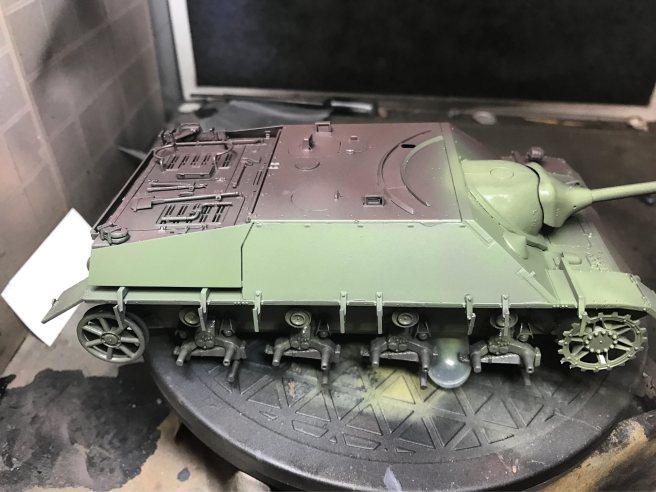
And spray it over the base color + hair spray. This is still wet– it darkens as it dries.

Once dry, you can then chip off some of the green to reveal the base color underneath, using a damp brush to reactivate the hairspray and let the green outer paint slough off. This is the “hair spray technique”. The calligraphy is a kit-supplied decal.
And now the good stuff:

The only existing photo of the real vehicle in Syrian service, from a 1950s military parade…

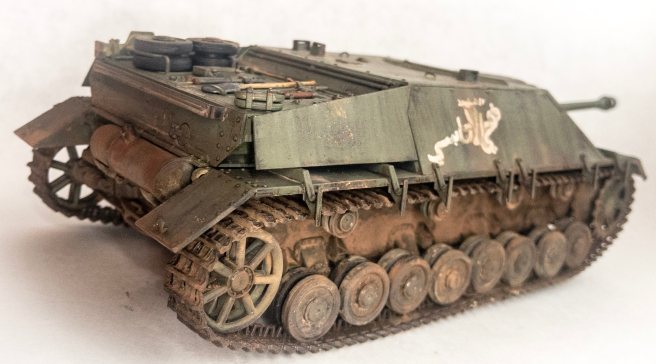
Side view. The calligraphy on the side is the name of a Syrian Martyr from a previous conflict. These type of decoration was considered lucky, and a sign of future victory. Various names can be seen on Panzer IVs and T-34/85s which were also used by Syria in this era.

A photo taken in the 1980s of the single jagdpanzer lost by Syria in 1967, it took a single penetrating hit to the frontal armor and burnt out.

If you pay attention, you’ll see on one side the tracks are on backwards– when there aren’t many spares, you do this to extend the wear life span of the tracks, similar to rotating tires on a car.

Rear quarter shot showing off some chipping and streaking on the hull sides. As well pigments that match the color of the Israeli terrain were used.

Obviously this vehicle had been repainted in green since its German service, but I wanted to convey that it was 20+ years old, and likely heavily banged up and worn down. Thus the paint was shown to have worn, chipped, and bleached areas. As well, a few of the skirt-hangers on the side of the tank are knocked askew or missing completely.

This full color photo was taken just after hostilities ended. A captured Syrian tank in the foreground– and a captured Syrian Panzer IV (bought in the same shipment as the JagdPanzers!) in the background. This gives the best clue as to what color to paint the model. Some sources believe it was painted a slate grey, but my opinion was that it was a Soviet-esque green.

Top view. The semi-circular channel on the roof is for a sighting and aiming periscope that would track with the gun, which would emerge from the hole.

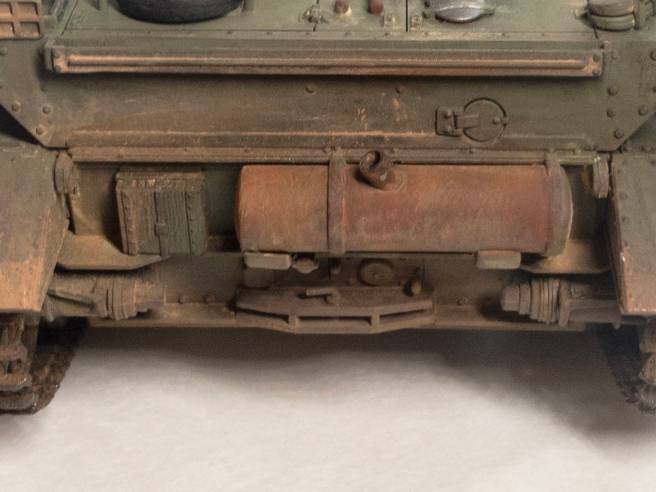
Rusty muffler! Always a great spot to add convincing details to your model 🙂

Spare wheels. Tools. There are photos of the Syrian PzIVs with near mint-condition surplus ww2 German tools on board– So I went with that look. Apparently a lot of these tools were stored in warehouses after the war, and didn’t deteriorate. So you see beat up, old, rusting tanks with brand-new shovels on them! The metallic look is created with polishing-powders buffed to a high shine.

Detail shot with chips, streaks, dusting, and other wear.

I added the wiring to the headlight to give a bit more detail to this already nice kit. This is made with flexible lead wire, made for fly-fishing.

I love this shot because it shows some of my favorite details– the life like middle eastern soil in the tracks; the shiny polished high-points of the tracks where they would wear on the firm ground, and the subtle pain chips on the “Beak” of the frontal armor.

Bit of sand, dust, and layers of grime. Almost entirely pigments applied in layers. You can see one of the missing skit hangers above the tracks.

Finished piece.
check out JandersUF’s instagram gallery and imgur
